What do the different baby food stages mean? How to tell which stage is best for your baby? Here’s what you need to know about each stage of baby food.
Walking through the baby food aisle can often be confusing. So can reading recipes for different “stages” of homemade baby food blends.
What does it mean when a baby food is labeled “Stage 1,” “Stage 2,” or “Stage 3?” And how can you tell whether a given “stage” is best for your baby at this point in their solid food journey?
Here’s what you need to know about the different stages of baby food, and how to select the right one for your baby.
Note: “Baby food” refers to store-bought and homemade purees, as well as multi-ingredient blends. Finger foods don’t fall into a “stage” of baby food.
Stages Of Baby Food: The Basics
The stages of baby food match up with different developmental milestones in your baby’s solid food journey --- from the simplest purees, to thicker mixtures, to chunky blends that almost mirror some of your own table foods.
“Stages” aren’t completely standardized, and the American Academy of Pediatrics doesn’t include information on baby food stages in its official guidance for introducing solids. But baby foods in the same stage usually share similar characteristics.
- Stage 1: Thinnest, almost watery purees with one ingredient
- Stage 2: Thicker, multi-ingredient mixtures
- Stage 3: Chunky, lumpy mixtures
Baby should move through the different baby food stages (and/or should be introduced to finger foods) so they gain experience with different textures and flavors. Choose or prepare baby food in the thickest texture that baby is ready for. Move to the next stage when the baby has mastered that texture.
Learn more about the baby food textures in this video from BuonaPappa:
|
--- |
Texture |
Ingredients |
When is baby ready? |
Ages to feed (approximate) |
|---|---|---|---|---|
|
Stage 1 |
Smooth, watery, thinly pureed |
One ingredient at a time |
When they’re ready for solids |
4-6 months old |
|
Stage 2 |
Thick, mashed or strained |
Multiple soft ingredients blended together |
Right after they’ve mastered thin purees |
6-8 months old |
|
Stage 3 |
Chunky, lumpy |
Multiple soft ingredients in bigger pieces |
After they’ve mastered the chewing needed for thick purees |
8-11 months old |
Stage 1 Baby Food: Thin, Simple, Watery Purees
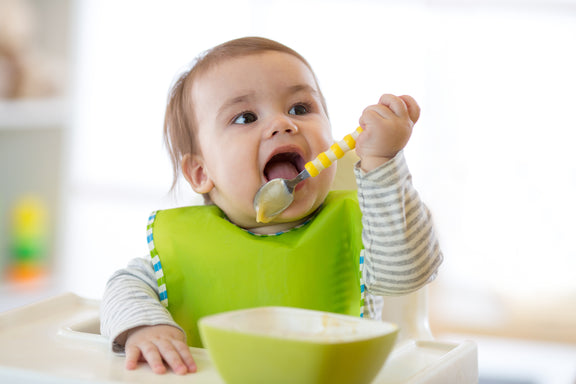
Stage 1 baby foods are the simplest purees, meant for babies who are just starting solids (approximately 4-6 months old). They are the thinnest baby foods, with no chunks or lumps. These baby foods are watery enough that they’ll easily drip off of a spoon.
Stage 1 purees are almost always made with one ingredient --- most commonly, one fruit or one vegetable. Sometimes thin purees with only one pureed meat also fall into stage 1.
Start with small spoonfuls, and don’t be alarmed if the food comes right out of your baby’s mouth when you first start (they need to get used to swallowing).
If you think it’s helpful to get baby accustomed to the food, you can thin out the puree even more with some breastmilk or formula, then stop adding the breastmilk or formula once baby is used to swallowing the diluted version.
Examples of stage 1 baby foods:
- Mango puree
- Blueberry puree
- Avocado puree
- Pear puree
- Carrot puree
- Smooth chicken puree
Stage 2 Baby Food: Thicker, Multi-Ingredient Blends
Stage 2 baby foods are thicker mixtures that contain blends of multiple ingredients --- fruits, vegetables, proteins, and/or grains.
Even though they are sometimes called “thicker purees,” they may be strained or mashed instead of pureed. They’re usually meant for babies between 6 and 8 months of age --- of course, every baby is different.
Although stage 2 purees are thicker than stage 1 purees, and although they may include extremely small pieces of softer foods, stage 2 purees are still fairly smooth.
Stage 2 purees are meant to start getting babies used to different textures and flavor combinations.
So, once baby has mastered the thinner purees of stage 1, it’s recommended to move them to stage 2 as soon as possible. This will broaden their palates and introduce them to more textures, giving them a head start on a lifetime of adventurous eating.
Introducing a variety of healthy flavors and textures encourages baby to choose and enjoy these foods later in life, and helps fight off future picky eating periods. This also builds their confidence in chewing and munching more foods.
Don’t be alarmed if baby gags once they start stage 2 baby foods. That’s just a natural way that baby’s body protects them from choking, as they start to explore the new textures for the first time. Just remember to start slowly when baby first moves to stage 2, to help them adapt.
Examples of stage 2 baby foods:
- Zucchini, apple, spinach and chicken blend
- Sweet potato with pear and pepper
- Apple, green beans and broccoli blend
- Blueberry, mango and avocado mix
- This list from Baby Foode has even more stage 2 baby food ideas.
Stage 3 Baby Food: Chunky, Lumpy Blends
Stage 3 baby foods are chunky and lumpy. They contain larger pieces of soft foods that train baby to develop munching and chewing skills (since munching and chewing are learned, not innate, behaviors). They’re meant for babies who have mastered the stage 2 textures and who are ready to explore a wider texture variety.
Stage 3 purees are designed for babies between 8 and 11 months of age. Again, though, every baby is different, so some babies will be ready sooner than others.
If you haven’t already, this stage is an ideal time to introduce baby to soft, baby-safe finger foods, to build up baby’s palate and chewing confidence even more. (Or, you might choose to wait a bit, until baby has started to master the stage 3 blends, before starting finger foods.)
Examples of stage 3 baby foods:
Approaches To Feeding Baby: How Baby Food Stages May Fit In
Surprisingly, you don’t have to follow the three-stage approach exactly in order when introducing solids. Rather, there are three main approaches to feeding baby, and the baby food stages fit in in different ways.
Baby-led weaning: If you choose this approach, you skip all the “stages” of baby food. Instead, you introduce finger foods right away when baby is ready for solids.
Stages in order, then finger foods: In this approach, you closely follow the three “stages” of baby food, introducing a new “stage” as soon as baby has mastered the last one. Then, you only introduce finger foods after baby masters the chunky purees of stage 3.
Purees + finger foods sooner: This approach introduces baby food “stages” and finger foods at the same time. First, introduce a few stage 1 purees. Then, after baby has eaten their first few smooth purees, start introducing finger foods. Feed them both the finger foods and stage 2 meals. Then, move to stage 3 meals alongside finger foods.
All three of these approaches are completely healthy ways to feed baby.
However, there are several things to keep in mind, especially if you decide to take baby through the baby food stages before starting finger foods.
Things To Keep In Mind When Feeding Baby: Making The Best Choices
- Introduce a wide variety of healthy flavors (we can’t emphasize this enough!) to encourage baby to become a lifelong healthy and adventurous eater.
- Progressing through the different baby food stages as soon as baby is ready, and introducing finger foods, makes introducing diverse flavors easier.
- Introduce baby to a variety of textures as well (smooth, mashed, thick and lumpy), so they’re ready to confidently explore different foods.
- Remember that babies are not born knowing how to swallow, munch and chew. These are learned skills that take practice. Introducing a variety of textures helps baby build confidence in these skills.
- As soon as baby masters one category of texture, challenge them with thicker textures.
- Even though texture variety is vital, if you’re making your own baby food, you’ll need to stick to softer food ingredients to minimize choking risk.
- Follow the U.S. Department of Agriculture (USDA) dietary guidelines for feeding children under the age of two:
- Introduce a wide variety of foods from all healthy food groups.
- Prioritize fruits and vegetables, in a variety of colors.
- Introduce proteins like meat, fish, seafood, eggs, soy products, nut products, and seed products.
- As far as grains, focus on whole grains.
- Pick foods high in iron and zinc.
- Introduce age-appropriate forms of common allergy-causing foods, like "peanut, egg, cow milk products, tree nuts, wheat, crustacean shellfish, fish, and soy."
- Avoid baby foods with added sugar. Children under two years of age don’t need added sugar, says the USDA.
- Feeding added sugar puts babies at risk for preferring overly sweet foods later in life, so it may encourage unhealthy eating habits.
- Avoid baby foods that are high in sodium. Also, avoid any rice-based ingredients in baby foods, because rice is high in arsenic.
- Aim to introduce finger foods at or before 9 months of age, regardless of which baby food stage your baby is currently on. This will help them get used to gagging and finger foods, so they won’t be anxious about their natural gag reflex.
- Gagging is a perfectly normal way that babies’ bodies protect them from choking. But near their first birthday, babies start acquiring fears. Babies could start to fear gagging and finger foods if these foods aren't introduced early enough.
Introducing Allergens While Feeding Purees
Key medical guidelines, including those from the USDA and AAAAI, recommend introducing common allergy-causing foods during baby’s first year of life, in age-appropriate ways. They also emphasize how important it is to keep feeding baby these allergens for at least several months. But how to introduce – and keep feeding – these foods when your baby is only eating purees? Peanut, egg, and milk can be very difficult to feed baby if you take a DIY approach.
Ready. Set. Food! is a much easier way to keep feeding crucial allergens to your little one, and give your baby the best chance at food freedom later in life.
Start with our Stage 1 Mix-Ins to introduce peanut, egg, and milk (the three most common childhood food allergens) as early as 4 months of age – they fully mix into breastmilk, formula, or solid food like your baby’s puree.

Then, once you’ve introduced baby to these foods, you can feed baby our Ready. Set. Food! Organic Purees, the first and only purees with peanut, egg, and milk already mixed inside. Choose from our three yummy flavors: Daniel Tiger Banana Blueberry, Daniel Tiger Apple Banana Carrot, and Apple Peach Cinnamon. These multi-ingredient purees are made for babies ages 6+ months, after you’ve already started feeding them peanut, egg, and milk.
As parents ourselves, our goal is to make early allergen introduction as simple, mess-free and convenient as possible; our Organic Puree is the perfect solution for busy families.

Pros And Cons Of Sippy Cups
Thinking about giving your little one a sippy cup? Today, we’ll co...

What Toddlers Eat In A Day: 12-18 Months Old
Looking for ideas of what to feed your 12-18 month old little one? ...

New Study Shows That Infant Anaphylaxis Usually Resolves With One Epinephrine Dose
A recent study has shown that, when infants experience severe aller...

Pregnancy Nutrition: What To Eat In The First Trimester
What to eat in the first trimester that will nourish your body, pro...

Formula Feeding Amounts: How Much Formula Should You Feed Baby Per Day?
How much formula should baby drink per day? It depends on their age...

What Baby Eats In A Day: 6-12 Months Old
Looking for ideas of what to feed your 6-12 month old little one? H...
All health-related content on this website is for informational purposes only and does not create a doctor-patient relationship. Always seek the advice of your own pediatrician in connection with any questions regarding your baby’s health.
These statements have not been evaluated by the Food and Drug Administration. Products are not intended to diagnose, treat, cure or prevent any disease. If your infant has severe eczema, check with your infant’s healthcare provider before feeding foods containing ground peanuts.

